A bit about Bitsy
Hi all!
If you’ve always wanted to learn how to make games but didn’t know where to start, I recommend you giving Bitsy a try.
It’s a full cycle HTML-based game editor for creating simple games and small worlds. This means that your game is as undemanding and accessible as possible. It can be easily published on Itch.io or any other free platform and shared with a wide range of players. According to the creator of the engine, Adam LeDoux, Bitsy’s goal is to “make it easy to make games where you can walk around and talk to people and be somewhere”. During the five years of the engine’s existence, it has nourished a lively and friendly community. Over 4000 games have been created. People told personal stories, created complex fantasy worlds, engaged in activism, and much more. Here is a far from exhaustive list of the most interesting and unusual of Bitsy games. You can learn more about the creation and history of Bitsy here.
Bitsy is a very newbie-friendly engine. It is designed for people who do not know how to program or use complex software. Your character can walk, communicate with other characters, pick up a “key” and open a “door” with it – and that’s about it. Everything is simple, as you can see, but in this case, simplicity is power. The strength of Bitsy is in its limitations: every pixel, word, and color has a lot of weight. There’s no place for noise. With it, you can create short story games or small adventures. Tell your story or share an important idea interactively – avoiding time-consuming and labor-intensive development. On the other hand, you can be one of the many resourceful craftsmen who do incredible things with Bitsy. In many ways, you are only limited by your imagination.
Everything1 you need to make a game fits into one convenient interface in a single browser window. When you’re done editing, you’ll download the game as a web page that can be opened in any browser (although Chrome is preferred). Bitsy’s source code is open, it’s completely non-commercial and does not have any centralized platform for distribution, which means that there is no risk that it will stop being supported or turned off over time, as it happened with Flash.
Enough talk, let’s create
Now I’ll show you how to make a little game with Bitsy to demonstrate how simple and expressive it is. You can play the finished version of the game or download the its file here.
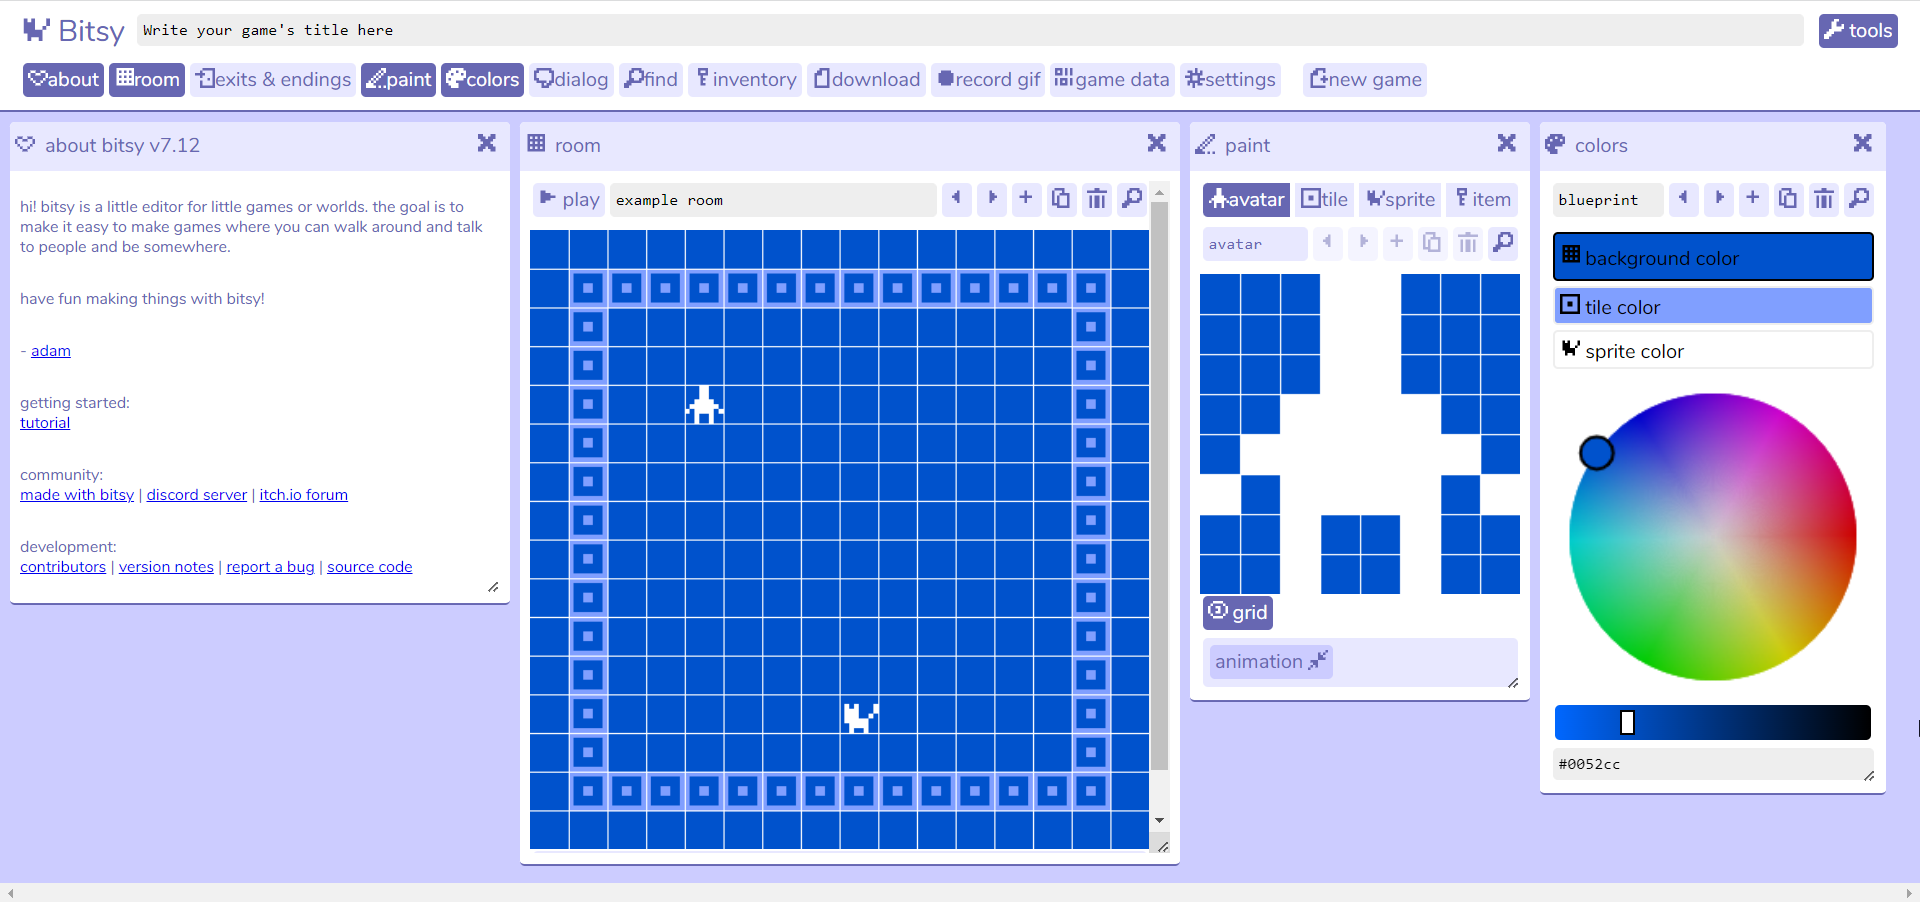
First, let’s look at the main interface of the editor:
Let’s start with the name of our game, which will be displayed at the very beginning when it starts. Write it in the bar console at the top of the screen:

There is a tool button to the right of the bar. It opens a panel with workspace buttons. If you want to try learning the engine yourself or learn more about its community, open about bitsy. To customize the interface language or color palette, open settings.
To create a simple game, we will use only 5 main areas:

Room
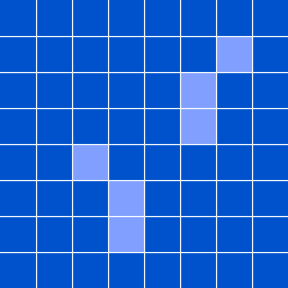
Basic stuff. 16x16 cells that can be filled with tiles or sprites (more on that below).
By default, the area for working with rooms looks like this:
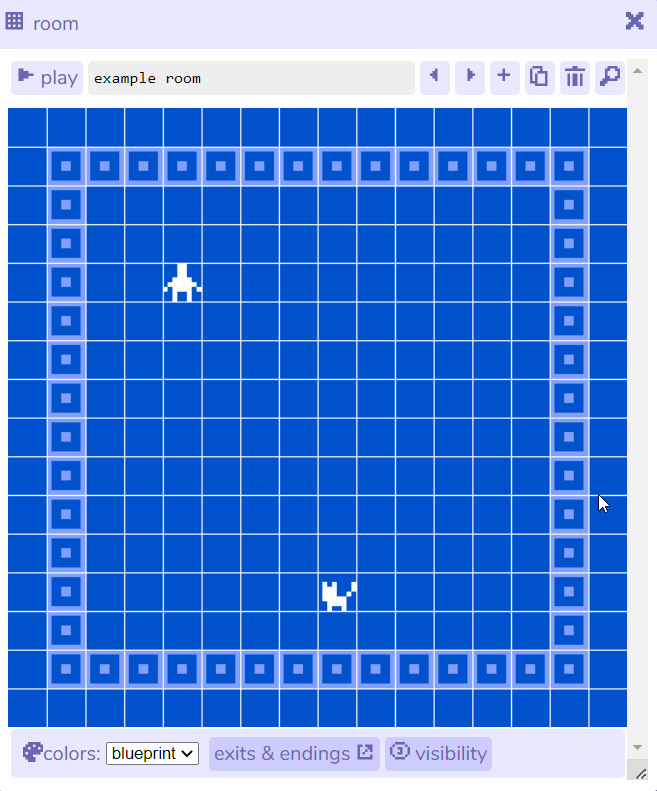
Click the play button in the upper left corner and see what happens!
Move the avatar using the arrow keys on the keyboard (these are the only controls available in Bitsy). Try to approach the cat and interact with them by pressing arrow in their direction. At any time, you can click the play button again, return to the edit mode, make changes, and then click it again to see how they appear in the game. This is everything you need to know about building a game in Bitsy. It really is that simple.
Come up with a name for your room and write it in the top bar:

I will name my room “the forest”.
Avatar, tiles, sprites, and objects
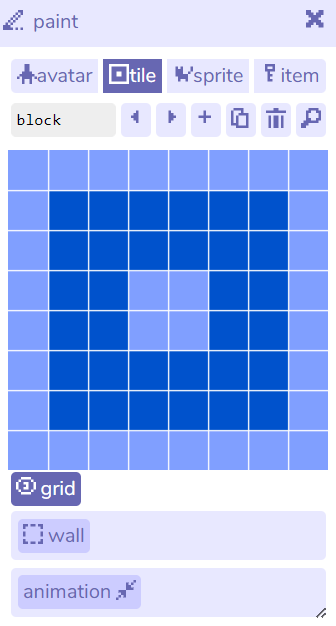
Now let’s move on to filling out our room! To do this, we need a paint area:
Any Bitsy game is built from several types of objects:
avatar – the one and only. That is, it does not change throughout the game (unless you use mods, but more on this later). A player controls it in a room and interacts with it with active objects.
tile – a background image from which the scenery of our space will be composed. Tiles are not interactive but can either be walkable or block the avatar’s path (configurable with the wall button).
sprite – an interactive static object. You can do all sorts of interesting things with it. For example, add dialogues, transition to other rooms, execute conditional statements, and much more.
item – an interactive object similar to a sprite, but it can be passed through and disappears when interacting with the avatar. Remember how I said that you can take the key and open the door with it? This is it. When an item is “taken” the game can also execute a certain script: show a dialogue, or do something more complicated (more on that below).
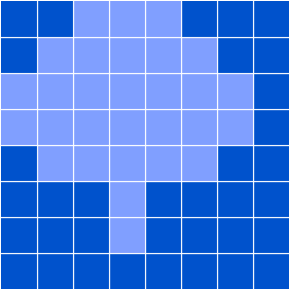
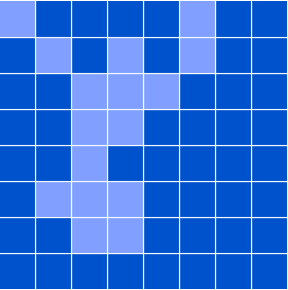
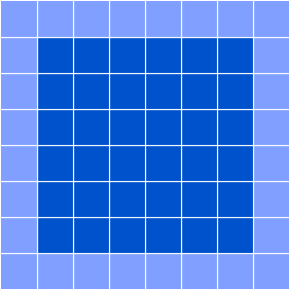
All objects – avatar, tiles, sprites, and items – are drawn with pixels on a two-color 8x8 grid in the middle of the work area.
Let’s start by drawing a new avatar. Click on the corresponding button and try to poke the cursor at the little man. It’s time to awaken your inner artist! If your inner artist refuses to be awakened, no problem either! You can copy one of the many 8-bit masterpieces on Pinterest, or from a set of ready-made images by Adam LeDoux. Although I strongly recommend you to experiment by yourself :)
Note that changes to the picture will immediately display in the room. This is very convenient, as it allows you to figure out the best visual design on the go, focusing on how the game will look as a whole.
My avatar looks like this:

Now let’s add some life to our character. To do this, open the animation panel at the bottom of the workspace:
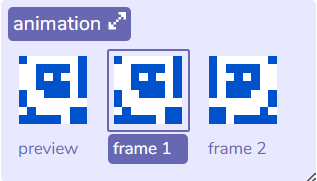
Make changes to the picture on any of the frames and see what happens. Your character is alive! Yes, this is a very short animation (the standard editor allows you to use only two frames, but the modders have already created a mod to bypass this limitation). But with a touch of creativity you can create a cool animated creature:
Now let’s fill our room with decorative elements. Since I’m drawing a forest, I’ll need trees, grass, and a path tiles:
To create a new tile, click + on the top bar. To navigate between the tiles you have already created, use the arrows: < >. You can also delete or duplicate tiles using the corresponding buttons. Don’t forget to give the tiles clear names – this will make it easier to find them in the future.
To add a tile to the field, simply select the tile in the paint panel, and then draw with it in your main space – just as you drew the tile itself before. You can also change the avatar position similarly.
Finally, let’s fill our room with interactive objects. To do this, go to the sprite or item and draw something that your character will interact with. In my case it will be a campfire sprite and a firewood item:
Add animations to your interactive objects if you like. In the dialog section, enter the text that will appear when interacting with them (I’ll tell you more about dialogs and the possibilities hidden in them a little later).
Place sprites or objects in the room. Note that only one instance of each sprite can exist in the game. That is, if you select a sprite in the paint panel and put it in another room, it will disappear from its previous place. So if I would want to add another campfire to my game, I would need to create its duplicate. This does not apply to items: they can be placed in any number.
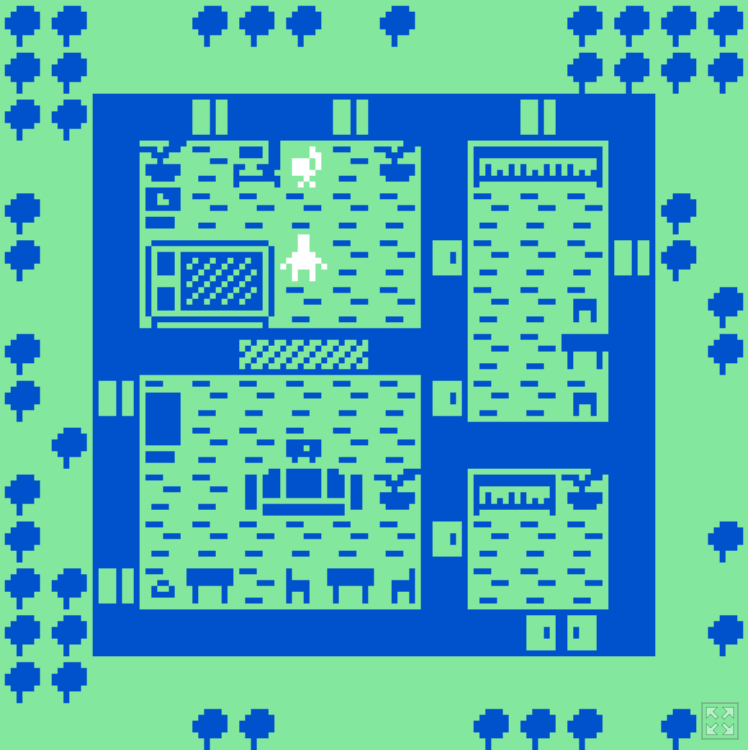
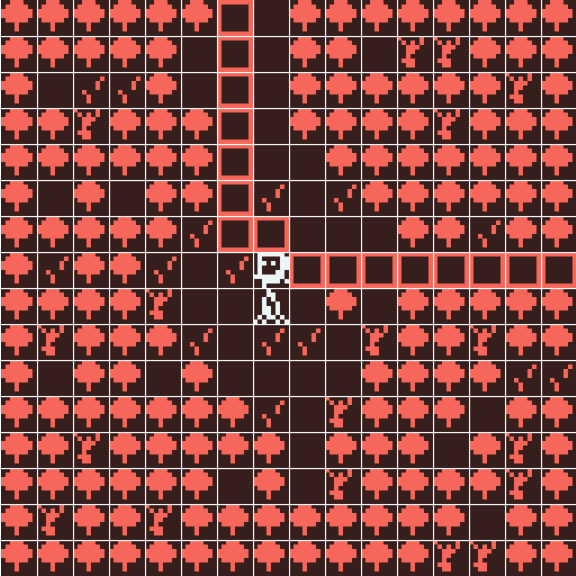
Half an hour later, I ended up with this forest:

Trees (walls, you can’t walk through them), paths (traversable tiles), a fire (sprite), and my avatar. Of course, you can also walk around the fire freely.
Try to run the game now. Walk for fun, and make changes to the design, if necessary. Don’t be afraid to experiment and start over. Bitsy is most convenient for such creative experimentation. Maybe you created your first space in an hour. The second time you will do it in 30 minutes, the third time it will only take you 10. Play around with the look of your tiles/sprites/avatar and their placement until you are happy with the result!
Color Palettes
It’s time to get rid of the boring pale blue standard palette and add some color to the game! The colors tool will help us with this:
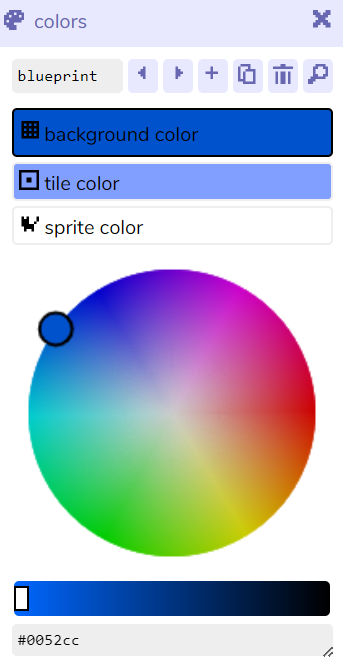
Each palette consists of three colors: background color, tile color, and sprite/character color. Select the element you need and change its color by moving the marker on the color wheel and brightness scale. Or enter the HEX index of the color you need from the HTML color.
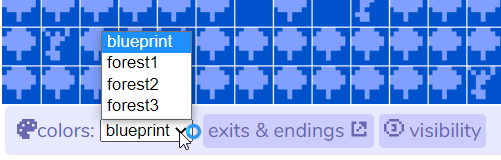
Having picked up a palette, apply it in your room by choosing from the drop-down list at the bottom of your room:
To keep your players from bleeding from their eyes to achieve a harmonious combination of colors, you can use, for example, an excellent palette of traditional Japanese colors Kuretake Gansai Tambi. Or if you want – create the most acidic and eye-catching palette to shock and awe your audience! After several experiments, I’ve ended up with this evening forest:
Exits and Endings
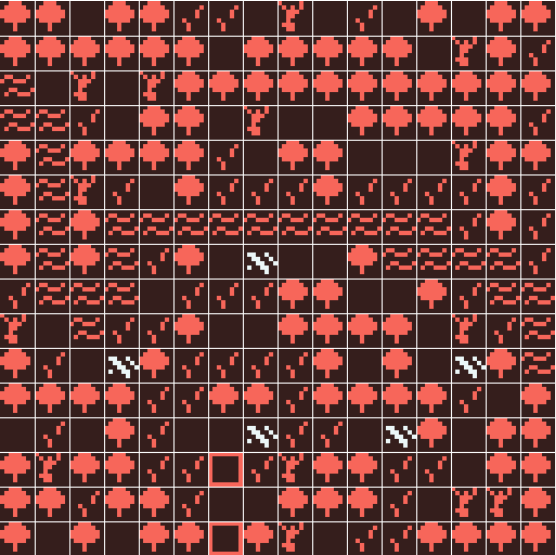
Playing in one room is boring, it’s time to expand the world of our game. To do this, create one or more rooms. For my game I made a room called “stream” with a forest thicket, a stream, and several firewood piles scattered here and there:
To connect the “forest” and “stream” rooms, we need to add an exit point to each of them, which will teleport the character from one location to another. To do this, select one of the rooms you want to connect and open the exits & endings panel. Click on the plus sign and select one of three options:
exit – two-way entry / exit to switch between rooms back and forth.
one-way exit – one way exit. When you don’t want the player to be able to return the way they came.
ending – activates the game end.
For my game, I use a regular exit and place one of them in the “stream” room, and the return point in the “forest” room:
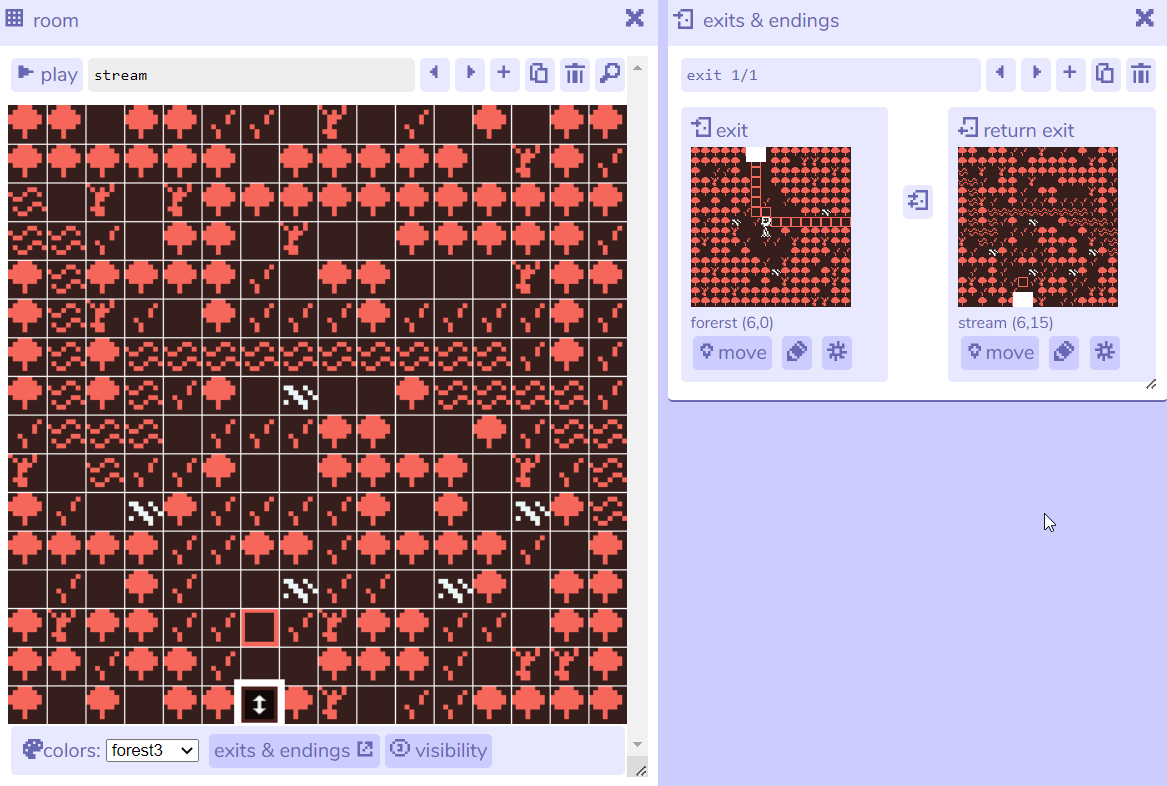
By the way, by clicking on the icon ⚙ next to the exit point, you can adjust the transition effect between rooms. For my game, I use “slide up” at the exit from the “forest” room and “slide down” at the exit from the “stream” room to add a sense of continuity:
(By the way, to quickly create such recordings from the game, you can use the built-in record_gif tool).
An important point to consider when placing exits is the orientation of the player in space. Placing exits in random places can feel disorienting. Therefore, if you want to create a sense of continuity in your game world, best to place the return point closer to the side of the screen opposite the one on which the exit point was located (if the character exits from the right, then it should appear from the left, and so on).
Exits are one of Bitsy’s most powerful and interesting tools. With their help, you can move the character not only between rooms but also within the same room. Take a moment to think about what possibilities this opens :)
You can think of them as teleports that allow you to move a character from one point to another. Also, with the help of exits, you can show dialog lines, change the values of variables, and so on.
A note on navigation
At this moment your game probably consists of a lot of objects: several tiles and sprites, a couple of rooms, and one or more palettes. The more complex and interesting your game becomes, the more objects it will contain, and navigating through them can become difficult. To find any object, open the find panel and look for the object, palette, or room you need in the appropriate categories:
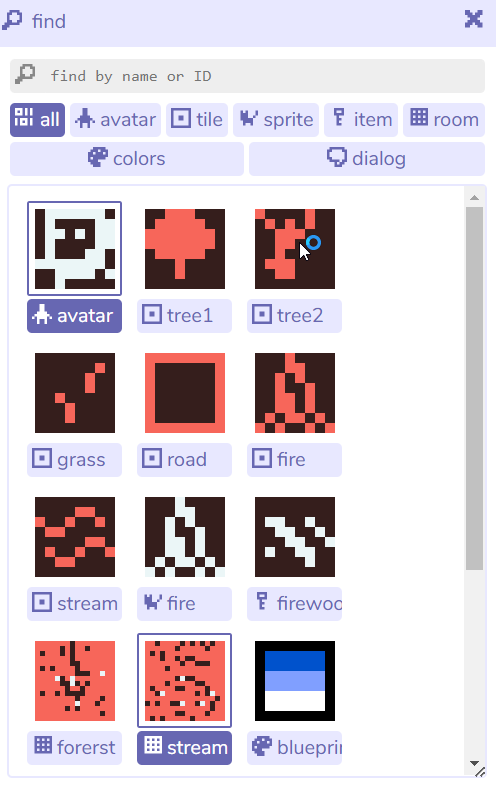
Pro tip: try to name all your objects so that they can be easily found later by name. For example, for tiles, use names like “forest_tree” or “stream_water”, where the first word indicates the room in which the tile is used, and the second – the object depicted on it. This will help you greatly in the future when you would want to find them by typing their name in the search bar (at the top of the panel). I recommend you take care of this in advance, before you decide to make a retro version of the Elden Ring and their number will exceed several thousand.
Dialogues and Game Logic
It’s time to add some logic to our game. To do this, we use an ultra-powerful dialog tool, which we already touched on in passing earlier:
Actually, the name “dialogs” is misleading, since the functionality of this tool is much wider than just displaying text lines. This is a game variable manager and a tool for scripting game logic in one bottle. Let’s take a look at an example.
Beware! Some technical details will follow. Nothing too difficult for experienced programmers or technical designers, but people who are far from these professions, in my experience, usually have some difficulties at this stage. However, only the most insignificant ones, since in scripting game logic Bitsy remains true to his principles: simple and visual.
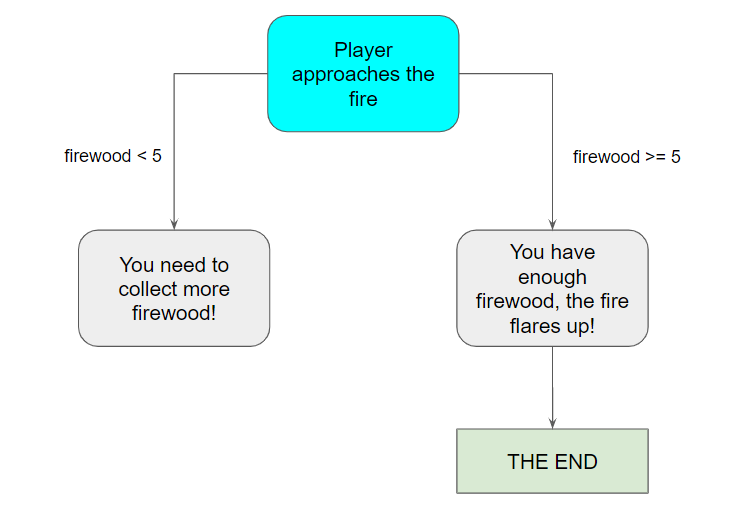
Let’s start by planning out. There is a campfire in my forest. It burns down, and the player must throw some firewood into it so that it flares up again. To do this, the player needs to collect firewood scattered throughout the forest. In total, 8 firewood pieces are scattered in the forest. For the fire to flare up again, the player needs to collect at least 5 firewood pieces and bring them to the fire. If the player approaches the fire without the required amount of firewood, nothing happens. If the player approaches the fire with enough firewood, the fire will flare up and the game will end. That is, in this case, we are using the firewood as a “key” that activates the end of the game.
Let’s present this quest as a simple logical diagram:
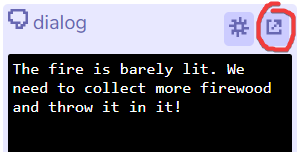
To implement this diagram, we need to rework the dialogue of the “bonfire” sprite. To do this, select the dialog of the corresponding sprite in the search menu, or open it from the paint tool by clicking on the button in the upper right corner of the dialog panel:
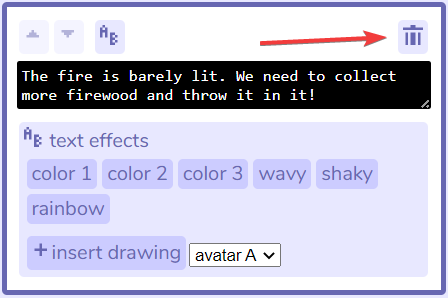
In the area that opens, delete the existing text string. Click on the white outline around the text block and click on the trash icon in the menu that opens:


Now click on the add button. A list of several possible options will open:
dialog – add a text line.
lists – add a list of several text lines or other actions.
exit and ending actions – add an exit or an ending (according to the same principle that we’ve described above).
item and variable action – add an action with an object or a variable.
For our purposes, let’s create a list. Lists determine the sequence and conditions for the appearance of text lines or the activation of events when a character interacts with a sprite. There are different lists too:
sequence list – the sequence of text lines that appear one after the other each time you interact with the sprite. After the list is exhausted, only the last replica is displayed.
cycle list – same as sequence list, but when exhausted, starts over.
shuffle list – text lines from this list will be selected randomly.
branching list – a branching list in which you prescribe conditions for the appearance of different lines. This is what we need in our case.
Select a branching list:
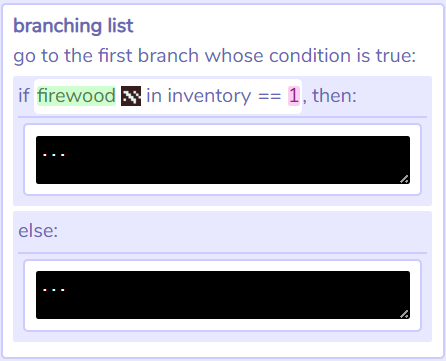
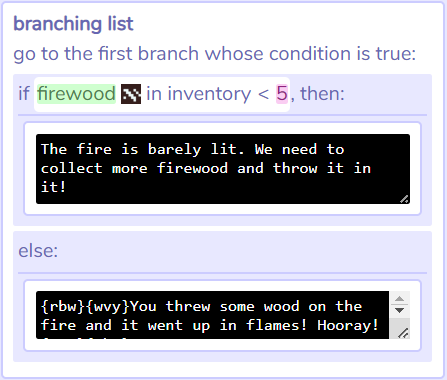
What you see is a visual form of the If / Else / Else If conditional operator, that is, a description of what will happen if condition A is met, and what will happen if it is not met. Usually, at this point, people with no programming training or mathematic background get very anxious and run away in a panic stop reading. But the truth is, it’s all very simple. Let’s update our diagram with branching list elements from the editor:
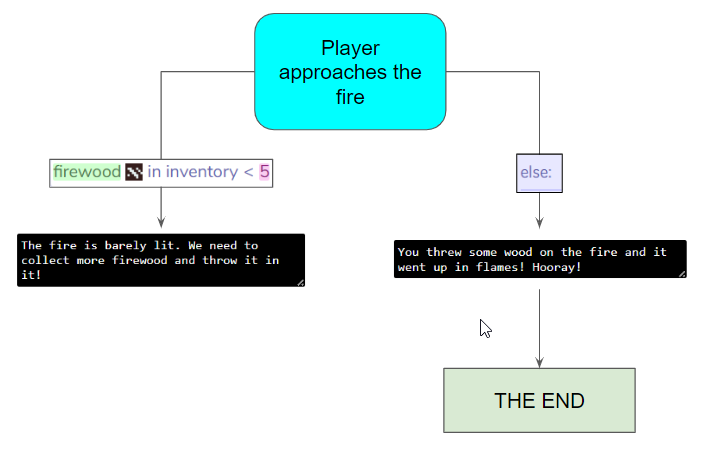
Hopefully, this all makes a little more sense now. We determine what happens if the player has less than 5 units of firewood in the inventory at the moment they interact with the fire sprite, and what happens in all other cases (else), that is, when player has more than or equal to 5 units of firewood.
To set the desired parameters, click on the blue block with the first condition. A small constructor will open, in which we will need to select the type of object (firewood), the amount (5), and the logical relation (in my case, firewood should be less than five, so we need to put the < sign).
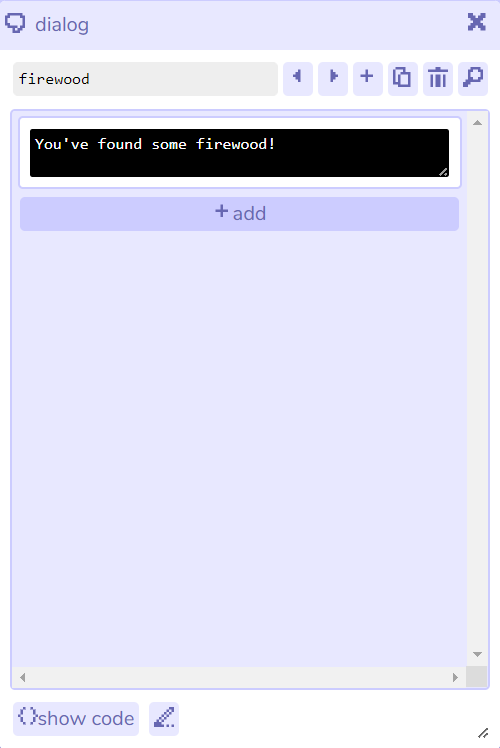
In the black fields write the text lines that will be played in each of the cases. To make the finishing line look fancier, let’s add some visual effects to it:
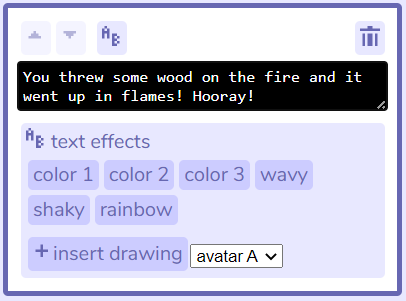
Note that the effect tags should be placed on both sides of the text you want to highlight:
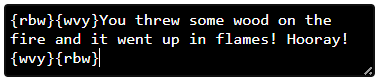
This is how this formatting appears in the game:
The only thing left is to add game completion after the stated parameter is met.
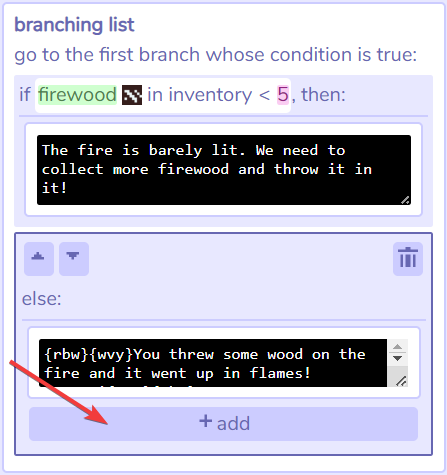
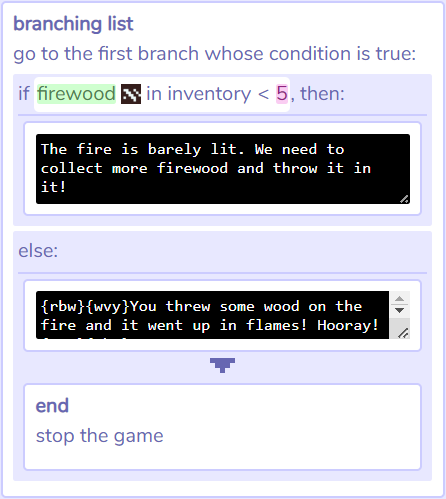
Select exit and ending actions in the drop-down menu, then select end. This is what it should look like in the end:
Let’s start the game and look at what we’ve got.
If the logic does not work the way you wanted, it means that a mistake has been made somewhere. No worries! Go back to your diagram and try to visualize all the logical chains in your game. Make sure that no mistakes were made at this stage and that all possible outcomes were taken into account, and that all the connections were built correctly. If the diagram is correct, check the implementation of this logic in Bitsy. Perhaps you’ve set the number of items incorrectly, or put the wrong sign. Or maybe you’ve accidentally added a block with an action to the wrong branch.
It’s worth noting that the dialogues interface in Bitsy may not always be convenient. If you feel confident and have some scripting experience under your belt, click on the show code button in the bottom left of the panel. Here you can write the logic directly using Bitsy’s own simple scripting language. Or, if you have experience with HTML, you can download the file and edit the game via a code editing tool, i.e. Atom.
You can do all sorts of other interesting things with dialogues in Bitsy. For example, lists with three or more branches, nested lists, variable-dependent conditions, and so on. For a more in-depth study of the engine, I recommend you read some of the tutorials on the official Wiki. We won’t go that deep in this tutorial though.
Saving and publication
If you’ve made it this far, congratulations! You’ve authored your first Bitsy game. I hope, making it was simple and enjoyable for you, and you were able to stretch your creative muscles to your heart’s content. It’s time to share your creativity with the world!
First off, a bit of advice: your game is wonderful, don’t be shy about it. This is your first original game, and it’s valuable for that reason alone. But to move on, you need to learn, and the best way to learn is to share your creativity with others and get feedback from them. Fortunately, a friendly community has formed around Bitsy, which is full of wonderful people happy to give feedback and help neophytes deal with technical problems.
Now let’s deal with the technical side of the issue. Downloading the game is as simple and intuitive as the rest of Bitsy. To do it, just click the download button in the tools panel and click “download game”:
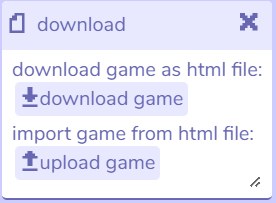
Now you have an HTML file with your game. You can open it in a browser and check if everything works as it should. In the future, you can also upload this file to Bitsy to return to editing your game (I recommend you make backup copies regularly to prevent unfortunate progress losses). This applies to ANY Bitsy game: you can easily open them through the editor in your browser and explore the internal structure of any project you like!
The next step is to decide how you want to distribute your game. You can make it a part of your web page, publish it on a game distribution platform, or simply share the file on social networks. In this article, I’ll go through the easiest and most convenient, in my opinion, way to publish Bitsy games through the Itch.io platform.
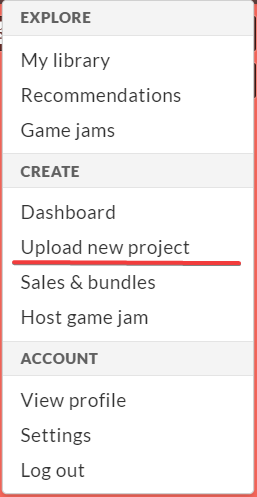
To get things started, go through a free registration on the site and create your account. Customize your profile if you wish, then select the “Upload New Project” option from the drop-down menu in the top right corner.
The project settings tab opens. Here you can design the page on which your game will display: come up with a name, slogan, and description, add a cover image and screenshots, so that those who open the page can immediately grasp what the game is about. I recommend you do all of the above to make your game more presentable, but I leave the specifics to your discretion. Here I’ll only go through the key technical points:
- In the “Classification” section, select “Games”.
- “Kind of project” – HTML. This means that your game will be played on a browser page.
- In the “Uploads” section, click “Upload files”, then select “This file will be displayed in the browser.” Since the whole game fits in one HTML file, you won’t need any additional manipulations with the archives.
- You can also download another copy of the HTML file so that players can download your game on their devices.
- In “Embed Options” specify any square window size. Bitsy games usually look good at 600x600 as it fits relatively well on most screen types. In “Frame options” you can also enable the “Fullscreen Button”, which will allow your player to open the game in the full-screen mode.
- For now, only the “Draft” option will be available in the “Visibility & access” section. To properly publish the game, click on the “Save & view page” button.
If you did everything right, you’ll see a preview of the page with your published game. Before presenting the game to the public, take a little more time to design its page. This can be done by clicking on the “Edit theme” button on the top bar:

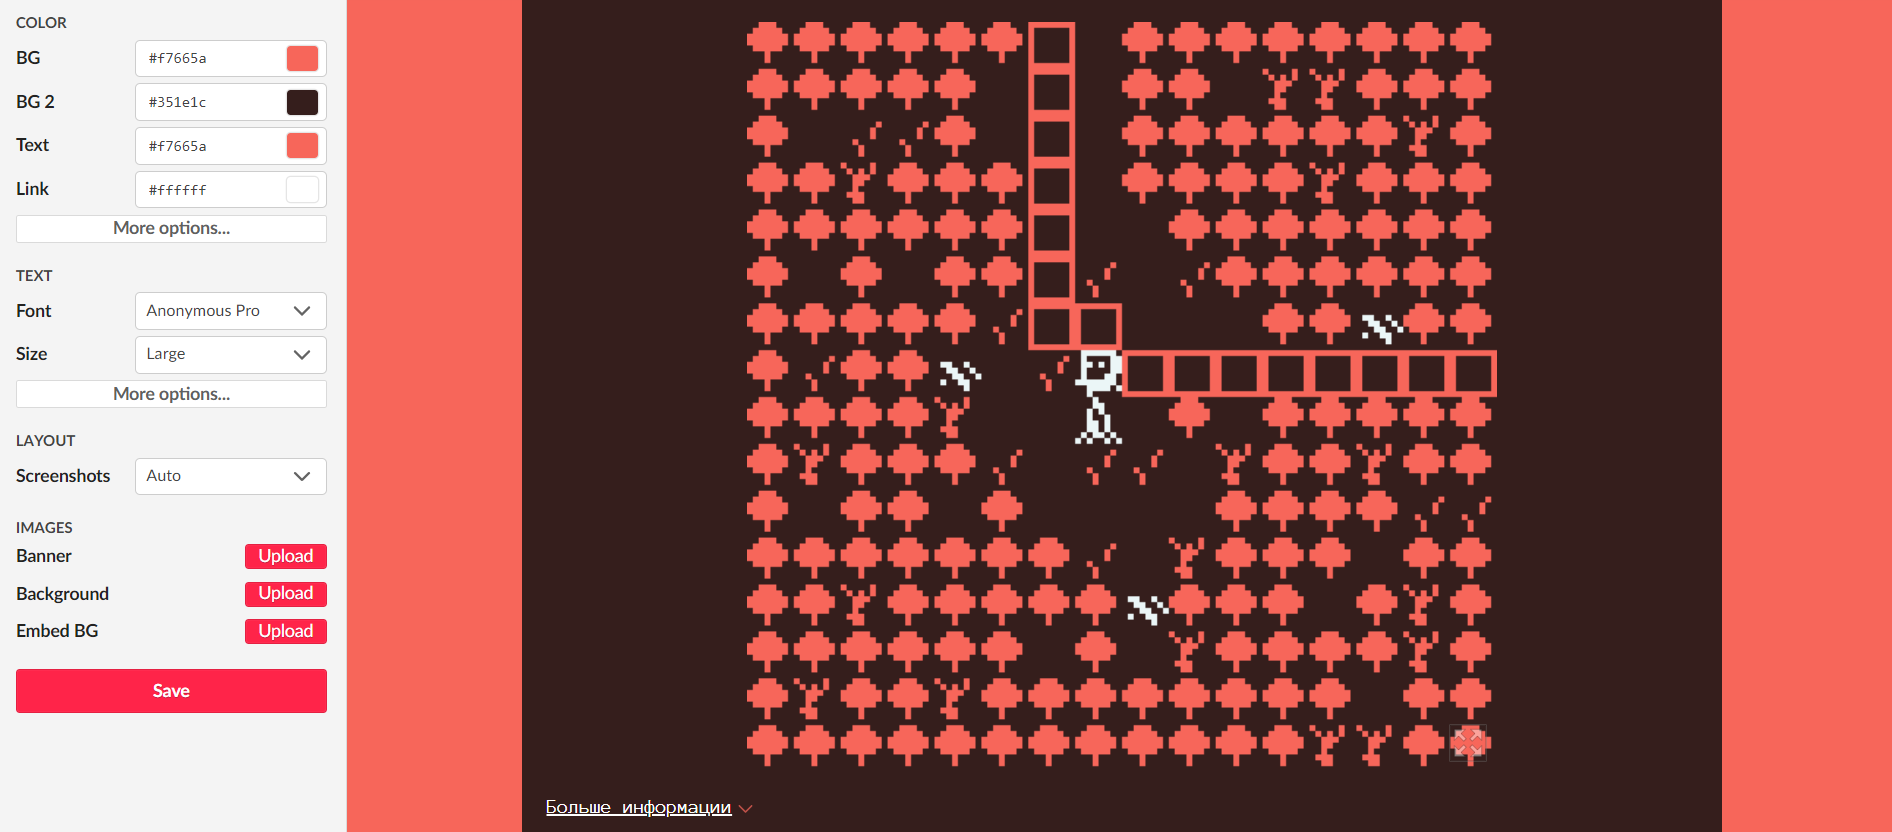
You can’t make a first impression twice, so I recommend you treat the game page design as an extension of the game design itself. Try to use the same color schemes as in the game, or vice versa, to make them contrasting. Upload a banner or add an image to the background. Try to think about what a player will see with their peripheral vision while playing your game, how it will affect their experience, and how these functional spaces can be used to make your game more expressive. Show your game page to your friends and closed ones and ask for their feedback.
When you’re done, click the “Draft” button, which will redirect you back to the project settings page. Select the “Public” type in the “Visibility & access” section and click “Save”.
Congratulations, your game is published!
What next?
If you enjoyed Bitsy, mastered its basic functionality, and would like to do more complex things with it, then I have good news for you. Enthusiasts have created many mods and hacks that significantly expand the engine and add new features, among others:
- Sounds and music
- Expanded color palette
- More frames in animations
- Combining several Bitsy games into one
- Tiles auto-generation from an uploaded image
- Running Bitsy games on an emulator without a browser
- More pixels to draw
- Extended dialog functionality
- And many many others.
Please note that some mods are not consistent with the latest version of Bitsy and may conflict with both the main editor and each other. Use them at your discretion and don’t forget to make backups!
Those who have difficulty drawing may borrow from selections of ready-made images and animations, like this, this, or this.
Conclusion
Hopefully, my article has come in handy to you :) You can create all sorts of wonderful things with Bitsy and share them with the world. For me personally, Bitsy has become not only a creative outlet but also a great way to explore and expose sensitive social topics that concern me directly, for example, overwork in the gaming industry and war. Of course, self-expression through games alone cannot solve these problems. They can only be solved by grassroots self-organization and collective action – for example, by forming unions and defending your interests before the employer.
Thank you for your attention and patience! Ask questions and share your Bitsy games in the comments!
-
Except music and sounds, that can be added only with mods. More on that below. ↩︎